


Create the PDF Batch Process
Creating the Batch Action
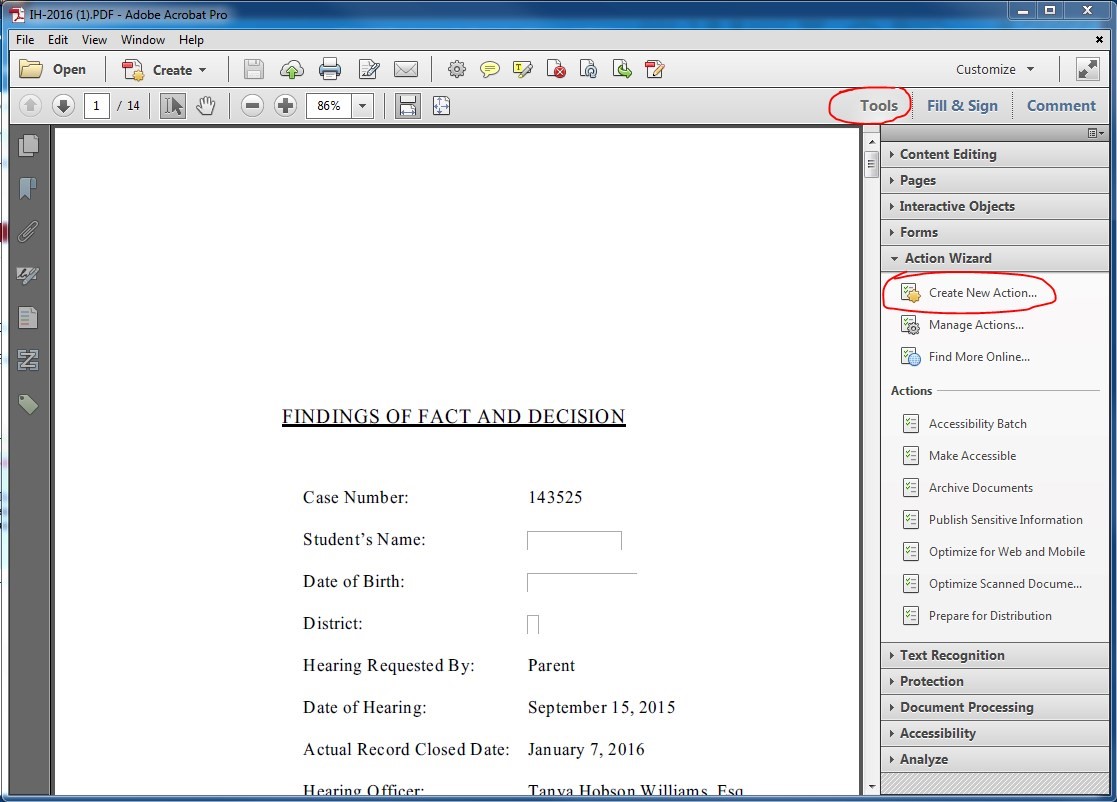
- Open a PDF file in Adobe Acrobat XI Pro
- Click Tools > Action Wizard > Create New Action…
Add Tags to Document
- In the left-hand section, under Choose tools to add: > Accessibility, click to select Add Tags to Document
- Click the move icon which is located between the 2 sections.
- The action will appear in the right-hand section, under Action steps to show: > Untitled.
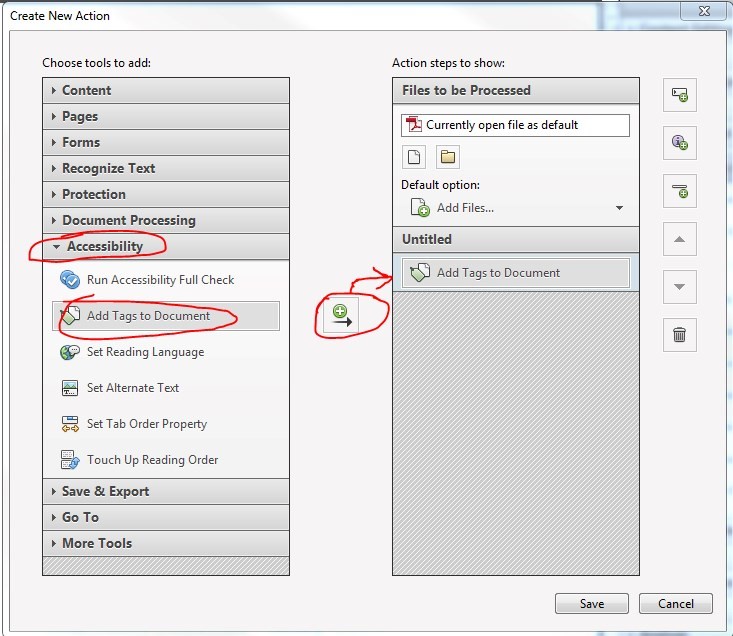
This action should only be used on PDFs that are missing tags. If this action is run on previously tagged PDFs it will replace those tags with a new set of tags which could be an issue if the previous tags were already in an accessible format.
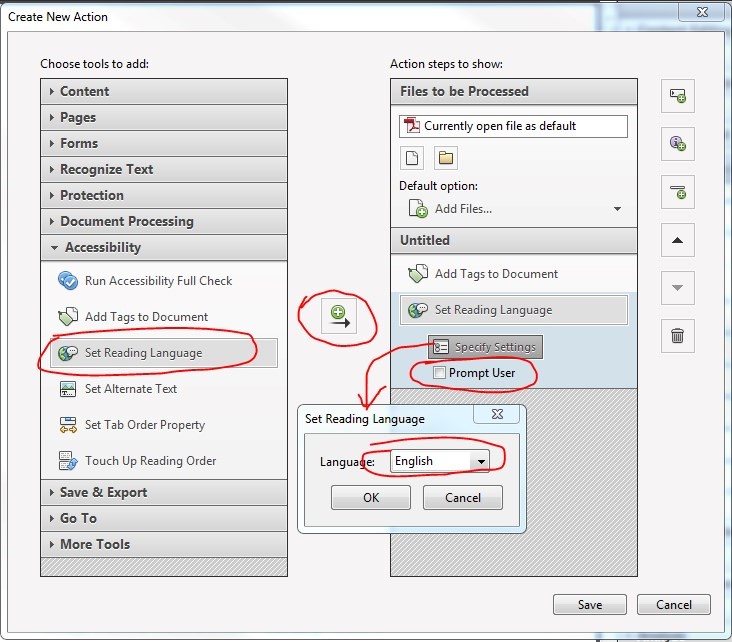
Setting the Reading Language
- In the left-hand section, under Choose tools to add: > Accessibility, click to select Set Reading Language
- Click the move icon which is located between the 2 sections.
- The action will appear in the right-hand section, under Action steps to show: > Untitled.
- Click Specify Settings
- In the Set Reading Language window, make sure English is selected.
- Click OK
- Be sure to uncheck prompt user so it will go automatically if they are all English documents.
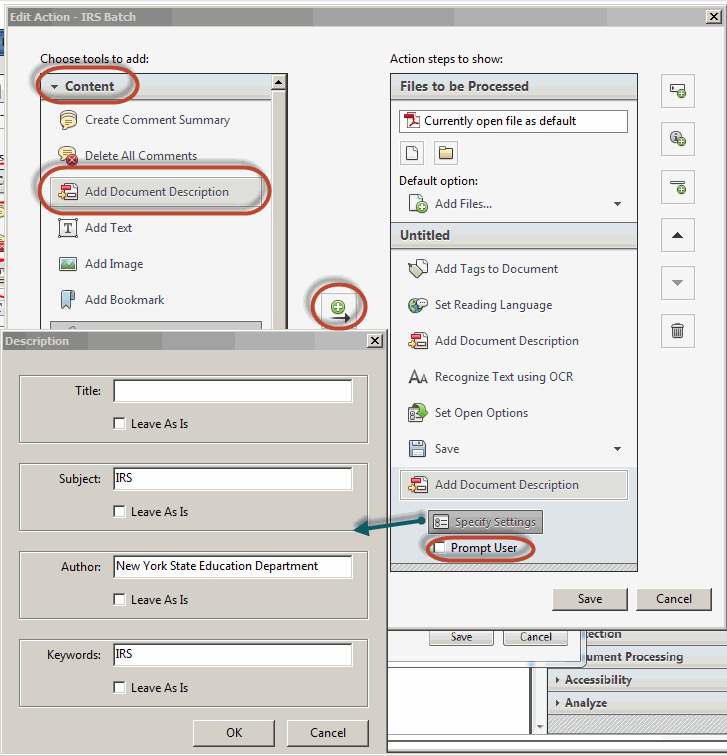
Add Document Properties
- In the Create New Action window, under Choose tools to add: click Content > Add Document Description.
- Click the move icon which is located between the 2 sections.
- Click Specify Settings
- Title and author are required for NYSED’s minimum accessibility requirements. Subject and keywords are also recommended. Important: after running the batch wizard, the document title and possibly subject and keywords will still need to be manually updated to match what is needed for each individual document.
- Under Title, de-select Leave As Is
- Under Subject, de-select Leave As Is. Type in the name of your program area. For example, Special Education.
- Author should always be set to “New York State Education Department,” unless the document was authored by an outside individual or organization. Under Author, de-select Leave As Is. Type in New York State Education Department.
- Click OK
- Be sure to uncheck prompt user
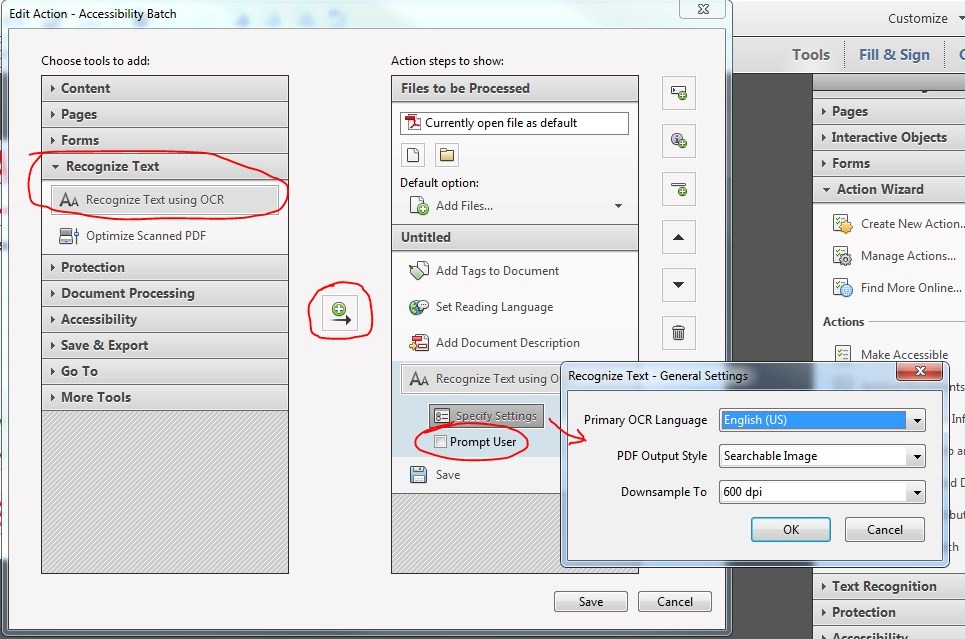
Recognize Text Using OCR and Use the Default Settings
- In the left-hand section, under Choose tools to add: > Recognize Text, click Recognize Text using OCR
- Click the move icon which is located between the 2 sections.
- Click Specify Settings
- In the Recognize Text – General Settings box:
- Primary OCR Language is set to English
- PDF Output Style is set to Searchable Image
- Downsample To is set to 600 dpi
- Click OK
- Be sure to uncheck prompt user so it will go automatically.
Important: if a document has even one character of text on a page then the OCR scan will skip the page. Therefore, it is important to manually review documents to ensure that all image based text has an accessible text version.
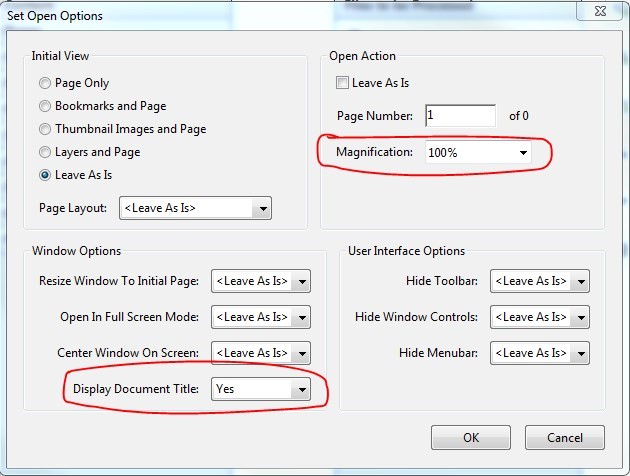
Set Open Options
- In the left-hand section, under Choose tools to add: > Document Processing, click to select Set Open Options
- Click Specify Settings
- In Set Open Options box, under Window Options
- Select Yes to Display Document Title.
- Under Open Action select magnification = 100%.
- Click OK
- Be sure to uncheck prompt user so it will go automatically.
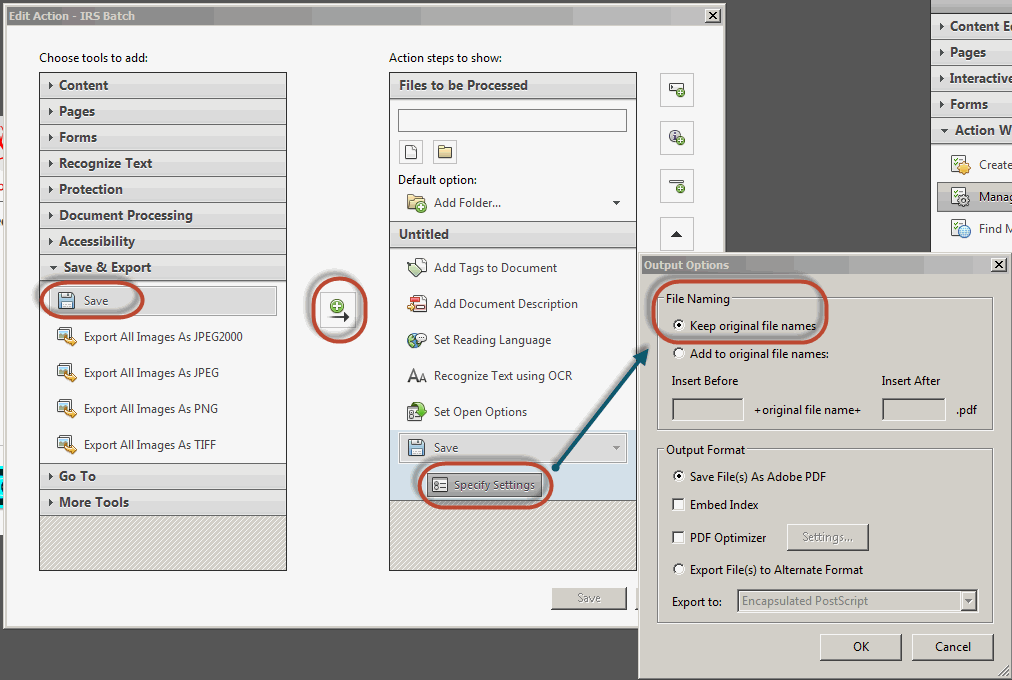
Add Save as an Action
Add Save as an action so that each file we automatically save and the process will continue automatically on all files selected. Files are to be overwritten with the same name.
- In the Create New Action window, under Choose tools to add, click Save & Export > Save.
- Click the move icon which is located between the 2 sections.
- Click Specify Settings
- In Output Options box, under File Naming, click to select Keep original file names
- Click OK
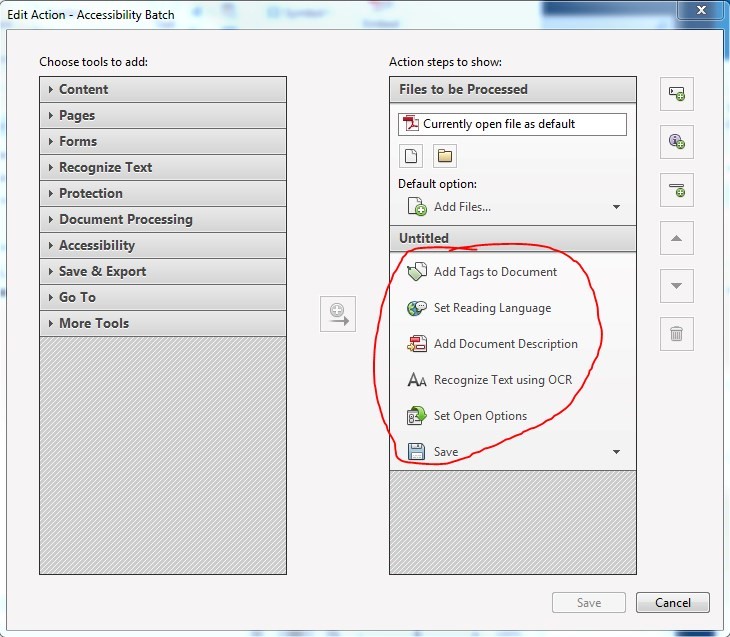
The action will now have the added processes listed:
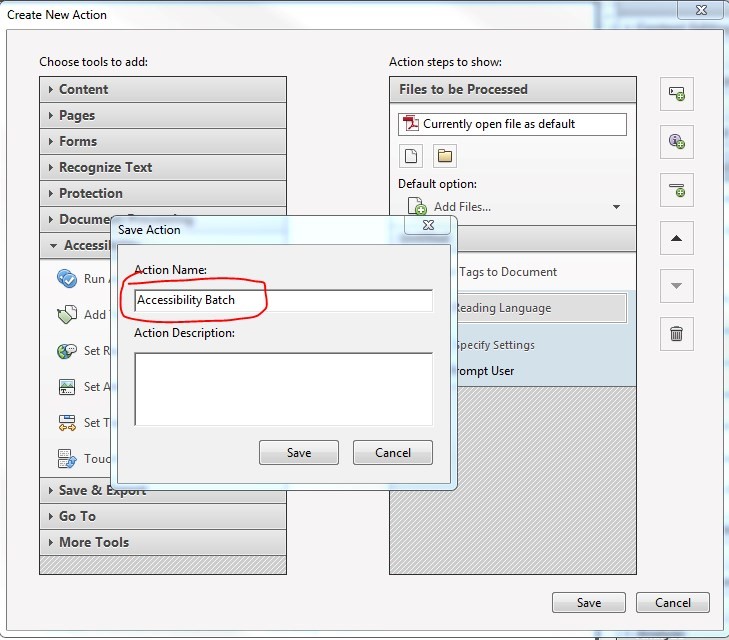
Save Action Wizard
- Click Save
- In the Save Action window, type in an Action name. It can be “Accessibility Batch” or anything you'd like.
- Click Save
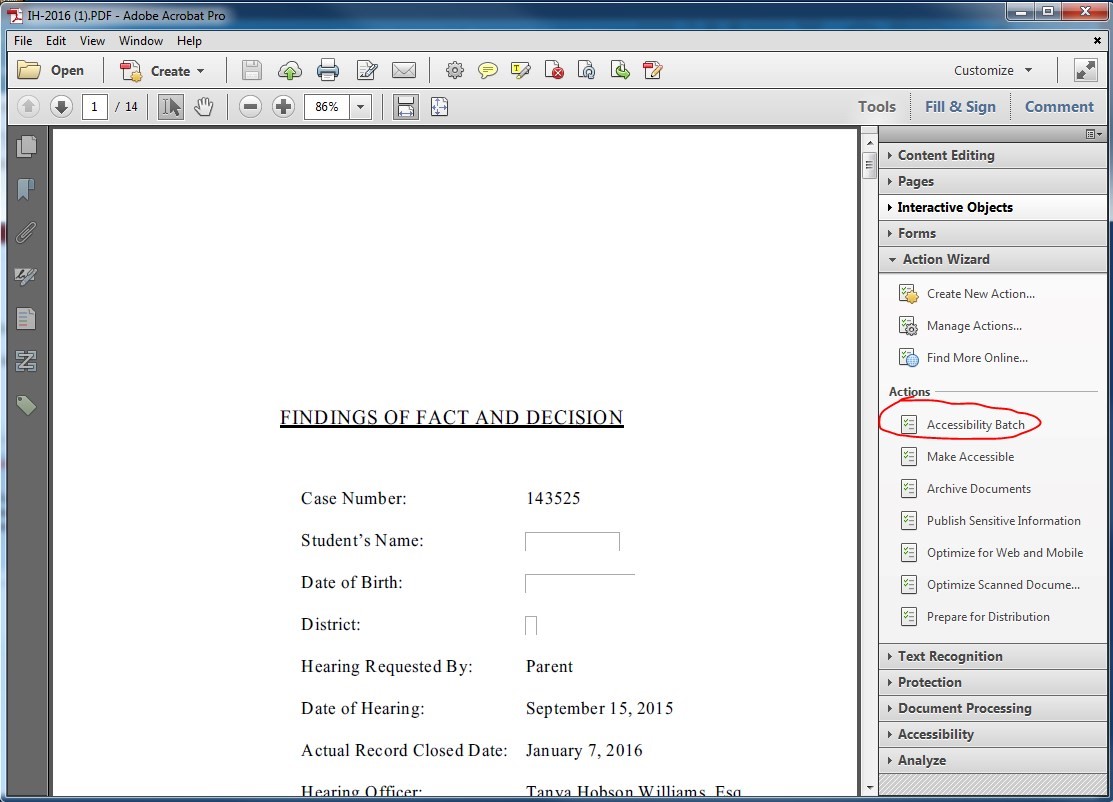
- The new action will be listed under Tools > Action Wizard > Actions
File Downloads: